Wireguard OpenWRT Travel Router Tutorial
OpenWRT Wireguard Travel Router
Pre-Requisite
The travel router will be a Wireguard Peer, so you will need an existing Wireguard server setup. Any of the previous examples will work as the Wireguard server. This tutorial will only cover setting up the Peer, not the server, since those steps were covered in other tutorials on the site.
You will also need:
- Raspberry Pi
- Wireless Adapter Compatible with OpenWRT
- Micro-SD card for OpenWRT
- OpenWRT
- Wi-Fi
- Ethernet cable
Setup
Download OpenWRT for your Raspberry Pi. Install it onto the sd card and then follow the next steps.
-
Power on your Raspberry Pi and connect a LAN cable to the ethernet port and connect your computer to that LAN cable.
-
The router should give out a DHCP address. If not, you will have to set your IP to 192.168.1. OpenWRT uses 192.168.1.1 by default
OpenWRT
Once you are able to access the admin gui interface on the Raspberry Pi navigate to the wireless section.
Radio0
Network -> Wireless
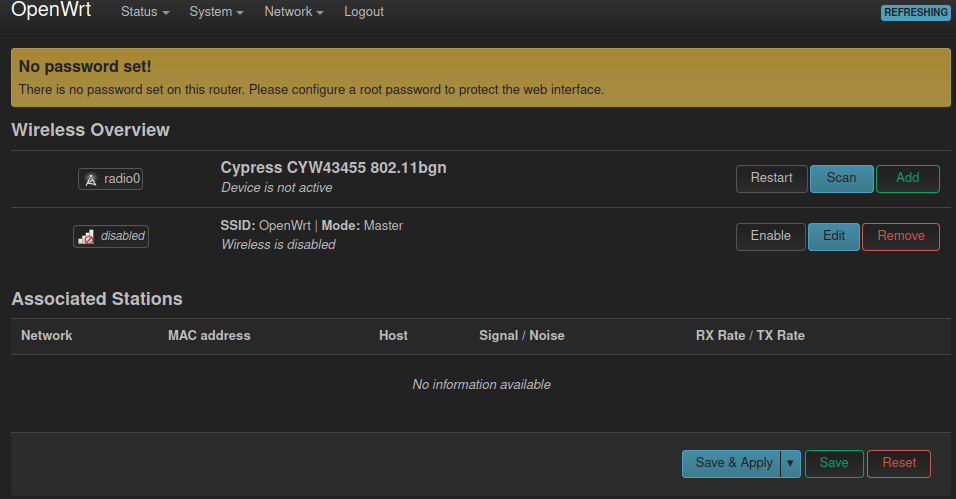
- Radio0 is the on-board wifi of the Rpi. Enable this device and then scan for wifi.
- Find your home network and connect to it.
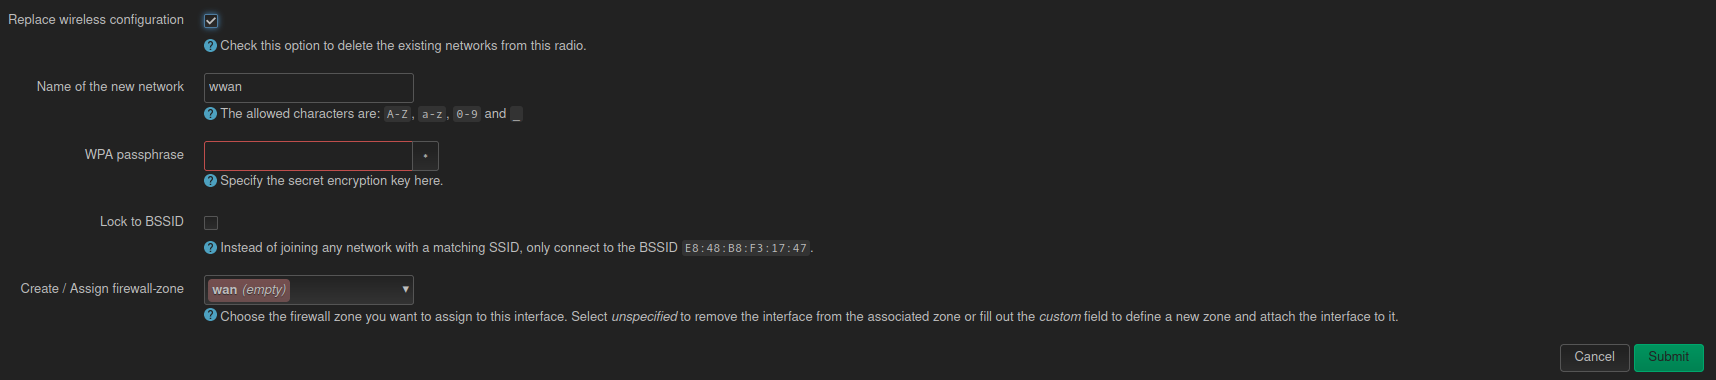
- After you’ve found your network select “Replace wireless configuration”
- Set the name to wwan
- Enter the WPA passphrase of your network and then click submit.
- You will be brought to another config page, but just click save and do not make changes
- This will give the Rpi network access.
Update and Install Packages
After you’ve connected the RPi to your local wifi you can update and install packages.
You will need to SSH into the Raspberry Pi and then run these commands.
To ssh run the following ssh root@<rpi-IP>. Repace <rpi-IP> with your actual IP. Usually it’s 192.168.1.1
Run
opkg update
to download the package repository list.
Then install wireguard.
opkg install wireguard-tools luci-app-wireguard
Both these commands can be run in the GUI.
Install USB Drivers
After you’ve installed Wireguard you will also need to install USB Drivers.
Run:
opkg install kmod-rt2800-lib kmod-rt2800-usb kmod-rt2x00-lib kmod-rt2x00-usb kmod-usb-core kmod-usb-uhci kmod-usb-ohci kmod-usb2 usbutils
Radio1
 Run
Run lsusb in the console to see what devices are connected to the RPi. After you have the list connect your wifi card to the USB port on your RPi.
 Run
Run lsusb again to see if a new device has been discovered. In this case the Ralink 802.11 n WLAN device has been found. Now you can switch back to the GUI
Radio1 Config
Under Network→Wireless you should now see a second radio device (radio1). Click Edit to bring up the config menu.

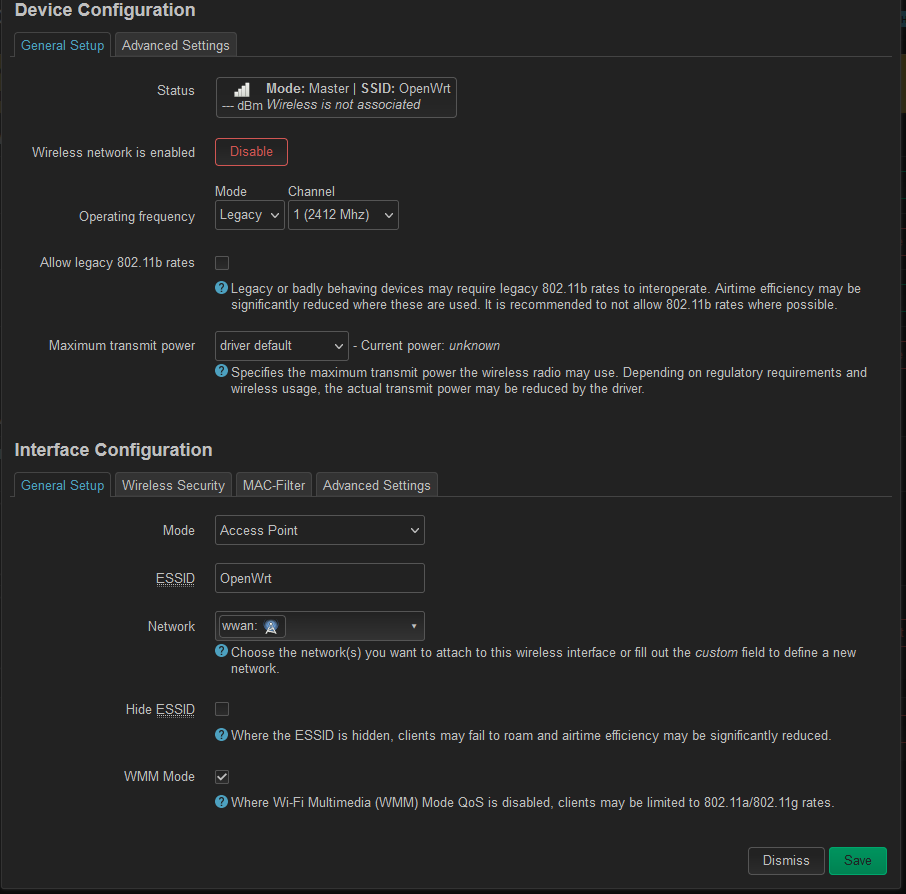
- Mode: Access Point
- ESSID: Anything you want (default OpenWRT)
- Network: wwan
Select Wireless Security.
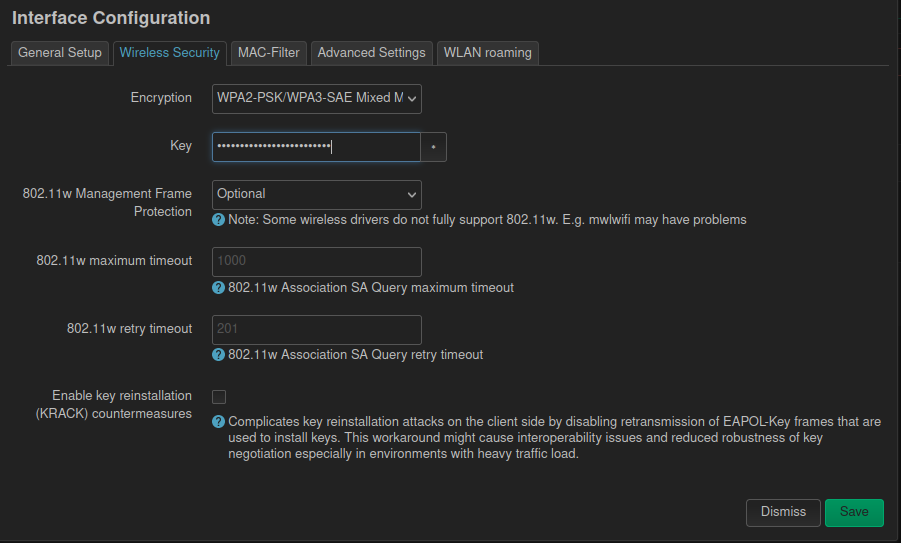
- Encryption: WPA2-PSK/WPA3-SAE Mixed Mode
- Key: This should be no less than 16 characters
- Click Save
- Then on the main Wireless Screen click save and apply
- Also be sure to enable the device
Wireguard Setup
Network → Interfaces
- Select Add new interface
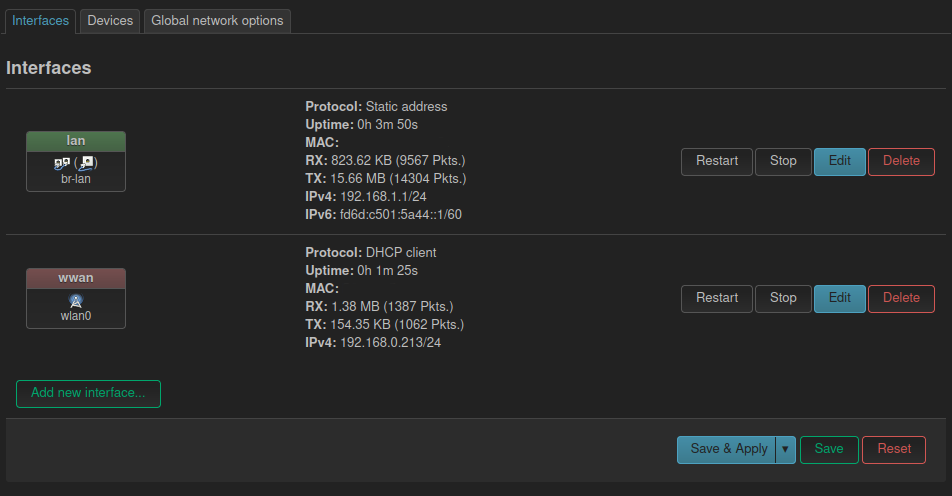
- Name: wg0
- Protocol: WireGuard VPN
NOTE: If WireGuard VPN does not show in the protocol list you may have to reboot your raspberry pi.

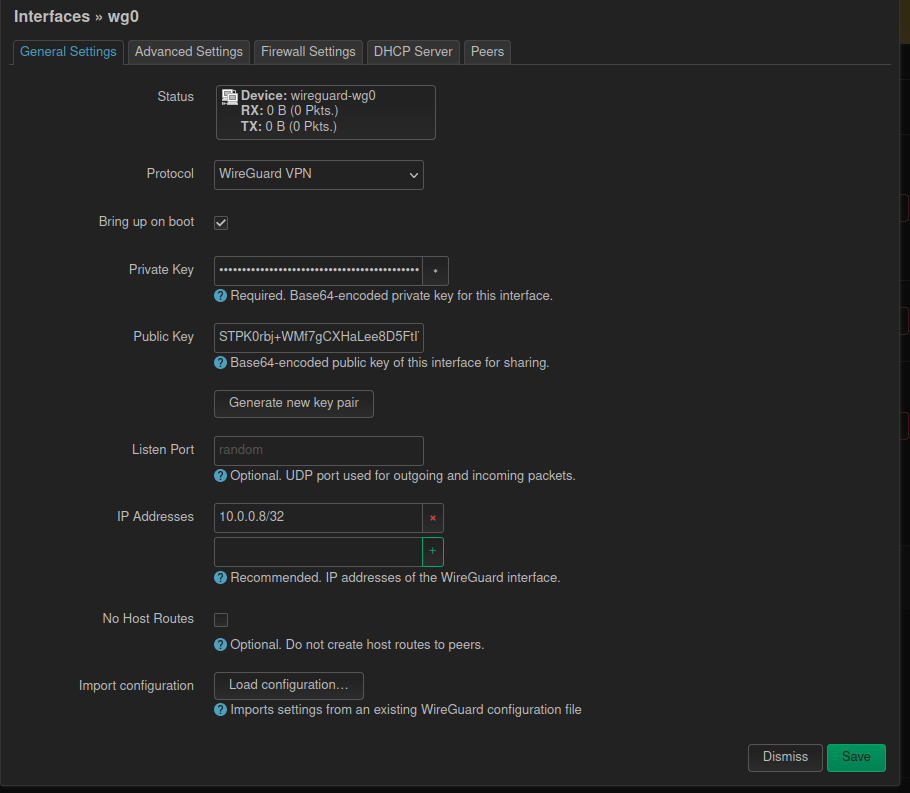
General Settings
NOTE You will need to create a peer on your Wireguard server prior to completing this step. The tutorial assumes you have already done so.
- Generate new Key Pair
- Ip Addresses: This will be the IP of the Peer you configure on your WG server.
The Public Key here will also go on your WG server as the Peer Public Key.
wg0 Peer
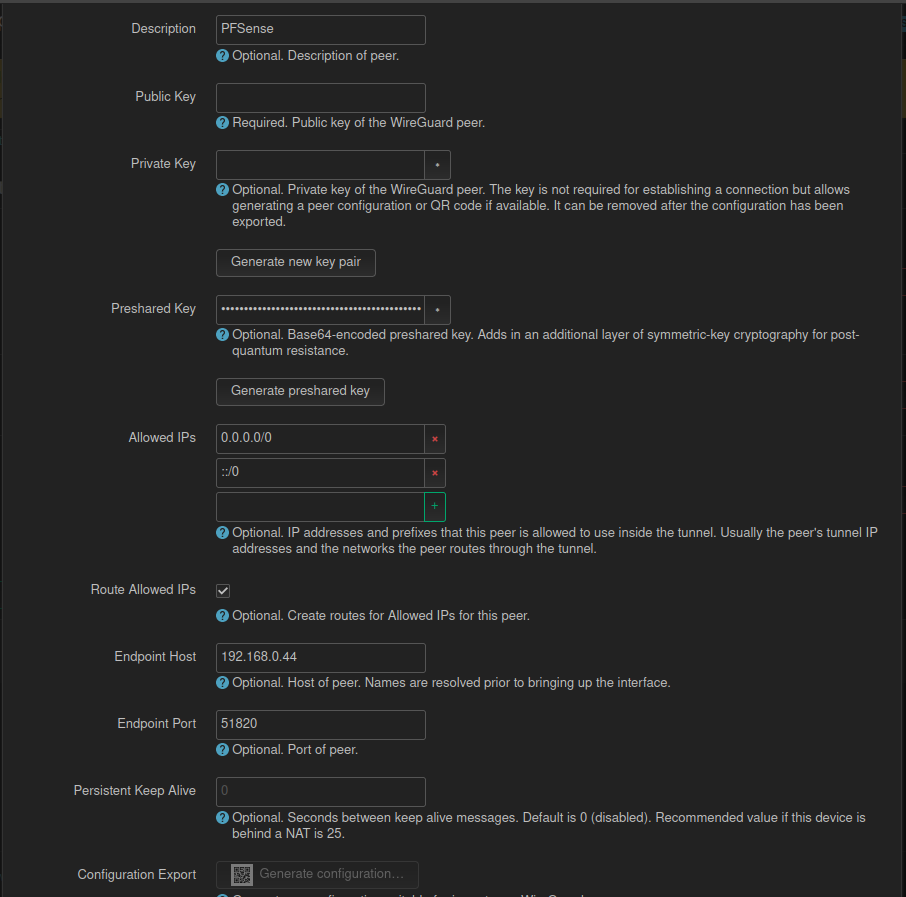
- Description: Anything you want
- Public Key: Server’s public key
- Private key: leave blank
- Preshared Key: PSK generated from server (do not generate here)
- Allowed IP’s:
0.0.0.0/0,::/0(allow all IPv4 & IPv6 Traffic) - Route Allowed IPs:
Check - Endpoint Host: Public IP of your server
- Enpoint Port: Port that wireguard is running on your server.
Once this has been completed. Click save and then click save and apply on the main Interface Page. You may have to restart the wg0 interface to establish a connection.
Firewall
Next we have to move back to the terminal to setup the firewall rules.
I reccommend copying the commands 1 by 1 to ensure everything is correct.
uci rename firewall.@zone[0]="lan"
uci rename firewall.@zone[1]="wan"
uci del_list firewall.wan.network="wg0"
uci add_list firewall.wan.network="wg0"
uci commit firewall
/etc/init.d/firewall restart
- Set zone 0 to lan
- Set zone 1 to wan
- Remove wg0 from wan network
- Add wg0 to wan network
- commit changes
- restart the firewall
Verify
After committing firewall changes you may have to reboot the RPi to get successful connection.
Once the device comes back online you should see traffic on the Network→Interfaces page under the wg0 interface. Rx & Tx should have numbers.