OpenWRT Wireguard Server Tutorial
OpenWRT Wireguard Server
Update Dependencies
opkg update
Install Wireguard
opkg install wireguard-tools luci-app-wireguard
Key Generation
umask u=rw,g=,o=
wg genkey | tee wgserver.key | wg pubkey > wgserver.pub
wg genpsk > wg.psk
Wireguard Interface Config
WG_IF="wg0"
WG_PORT="51820"
WG_ADDR="10.0.0.1/24"
Firewall Config
WG_KEY="$(cat wgserver.key)"
WG_PSK="$(cat wg.psk)"
WG_PUB="$(cat wgserver.pub)"
uci rename firewall.@zone[0]="lan"
uci rename firewall.@zone[1]="wan"
uci rename firewall.@forwarding[0]="lan_wan"
uci del_list firewall.lan.network="${WG_IF}"
uci add_list firewall.lan.network="${WG_IF}"
uci -q delete firewall.wg
uci set firewall.wg="rule"
uci set firewall.wg.name="Allow-WireGuard"
uci set firewall.wg.src="wan"
uci set firewall.wg.dest_port="${WG_PORT}"
uci set firewall.wg.proto="udp"
uci set firewall.wg.proto="udp"
uci set firewall.wg.target="ACCEPT"
uci commit firewall
/etc/init.d/firewall restart
Network Config:
uci -q delete network.${WG_IF}
uci set network.${WG_IF}="interface"
uci set network.${WG_IF}.proto="wireguard"
uci set network.${WG_IF}.private_key="${WG_KEY}"
uci set network.${WG_IF}.listen_port="${WG_PORT}"
uci commit network
/etc/init.d/network restart
Adding a Peer
There are 2 ways to go about this in OpenWRT
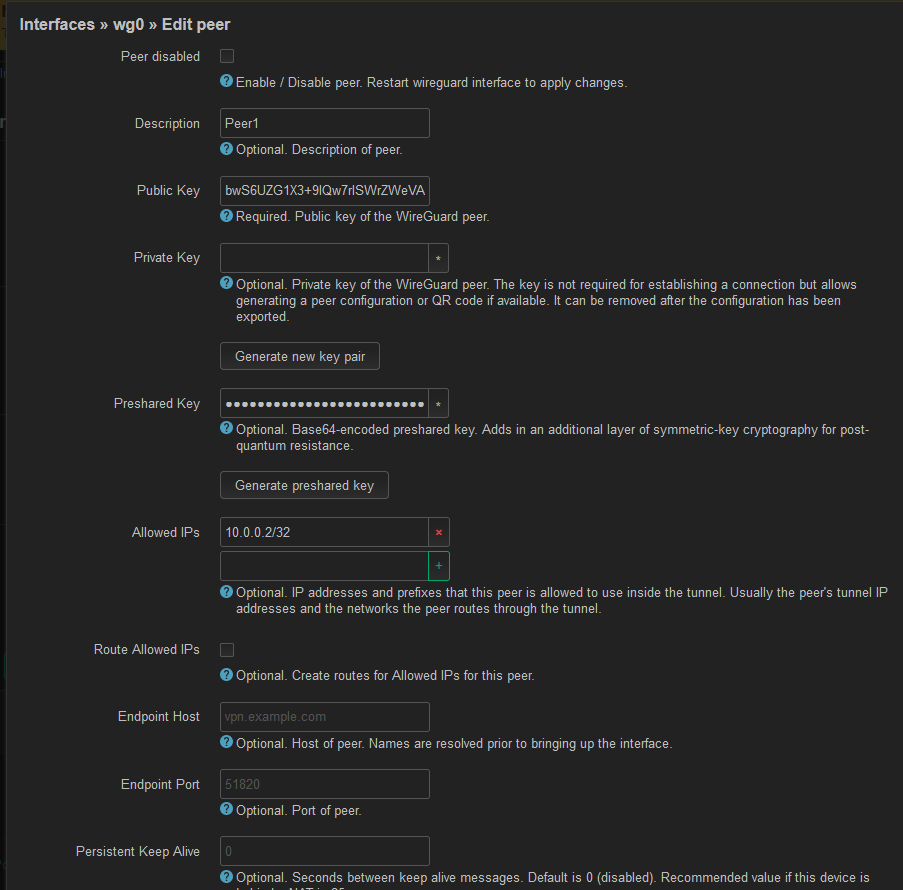
Option 1: You can configure the peer on the peer itself and share the keys.
Option 2: You can generate all the keys on the server, show a QR code and then the peer can scan that to get all the information that’s required. You must then remove the private key from the server so that the peer is the only one with knowledge of its private key.
Option 1
This option will require sending keys between both the server and the peer (in this case Android device)
Manual Config
- Set Peer Name
- Copy
Public KeyfromPublic Keygenerated in the phone app. - Click
Generate preshared keyand send this to the Peer. - Allowed IPs: Set this to a unique value within the server subnet range.
- Save
Option 1 Android
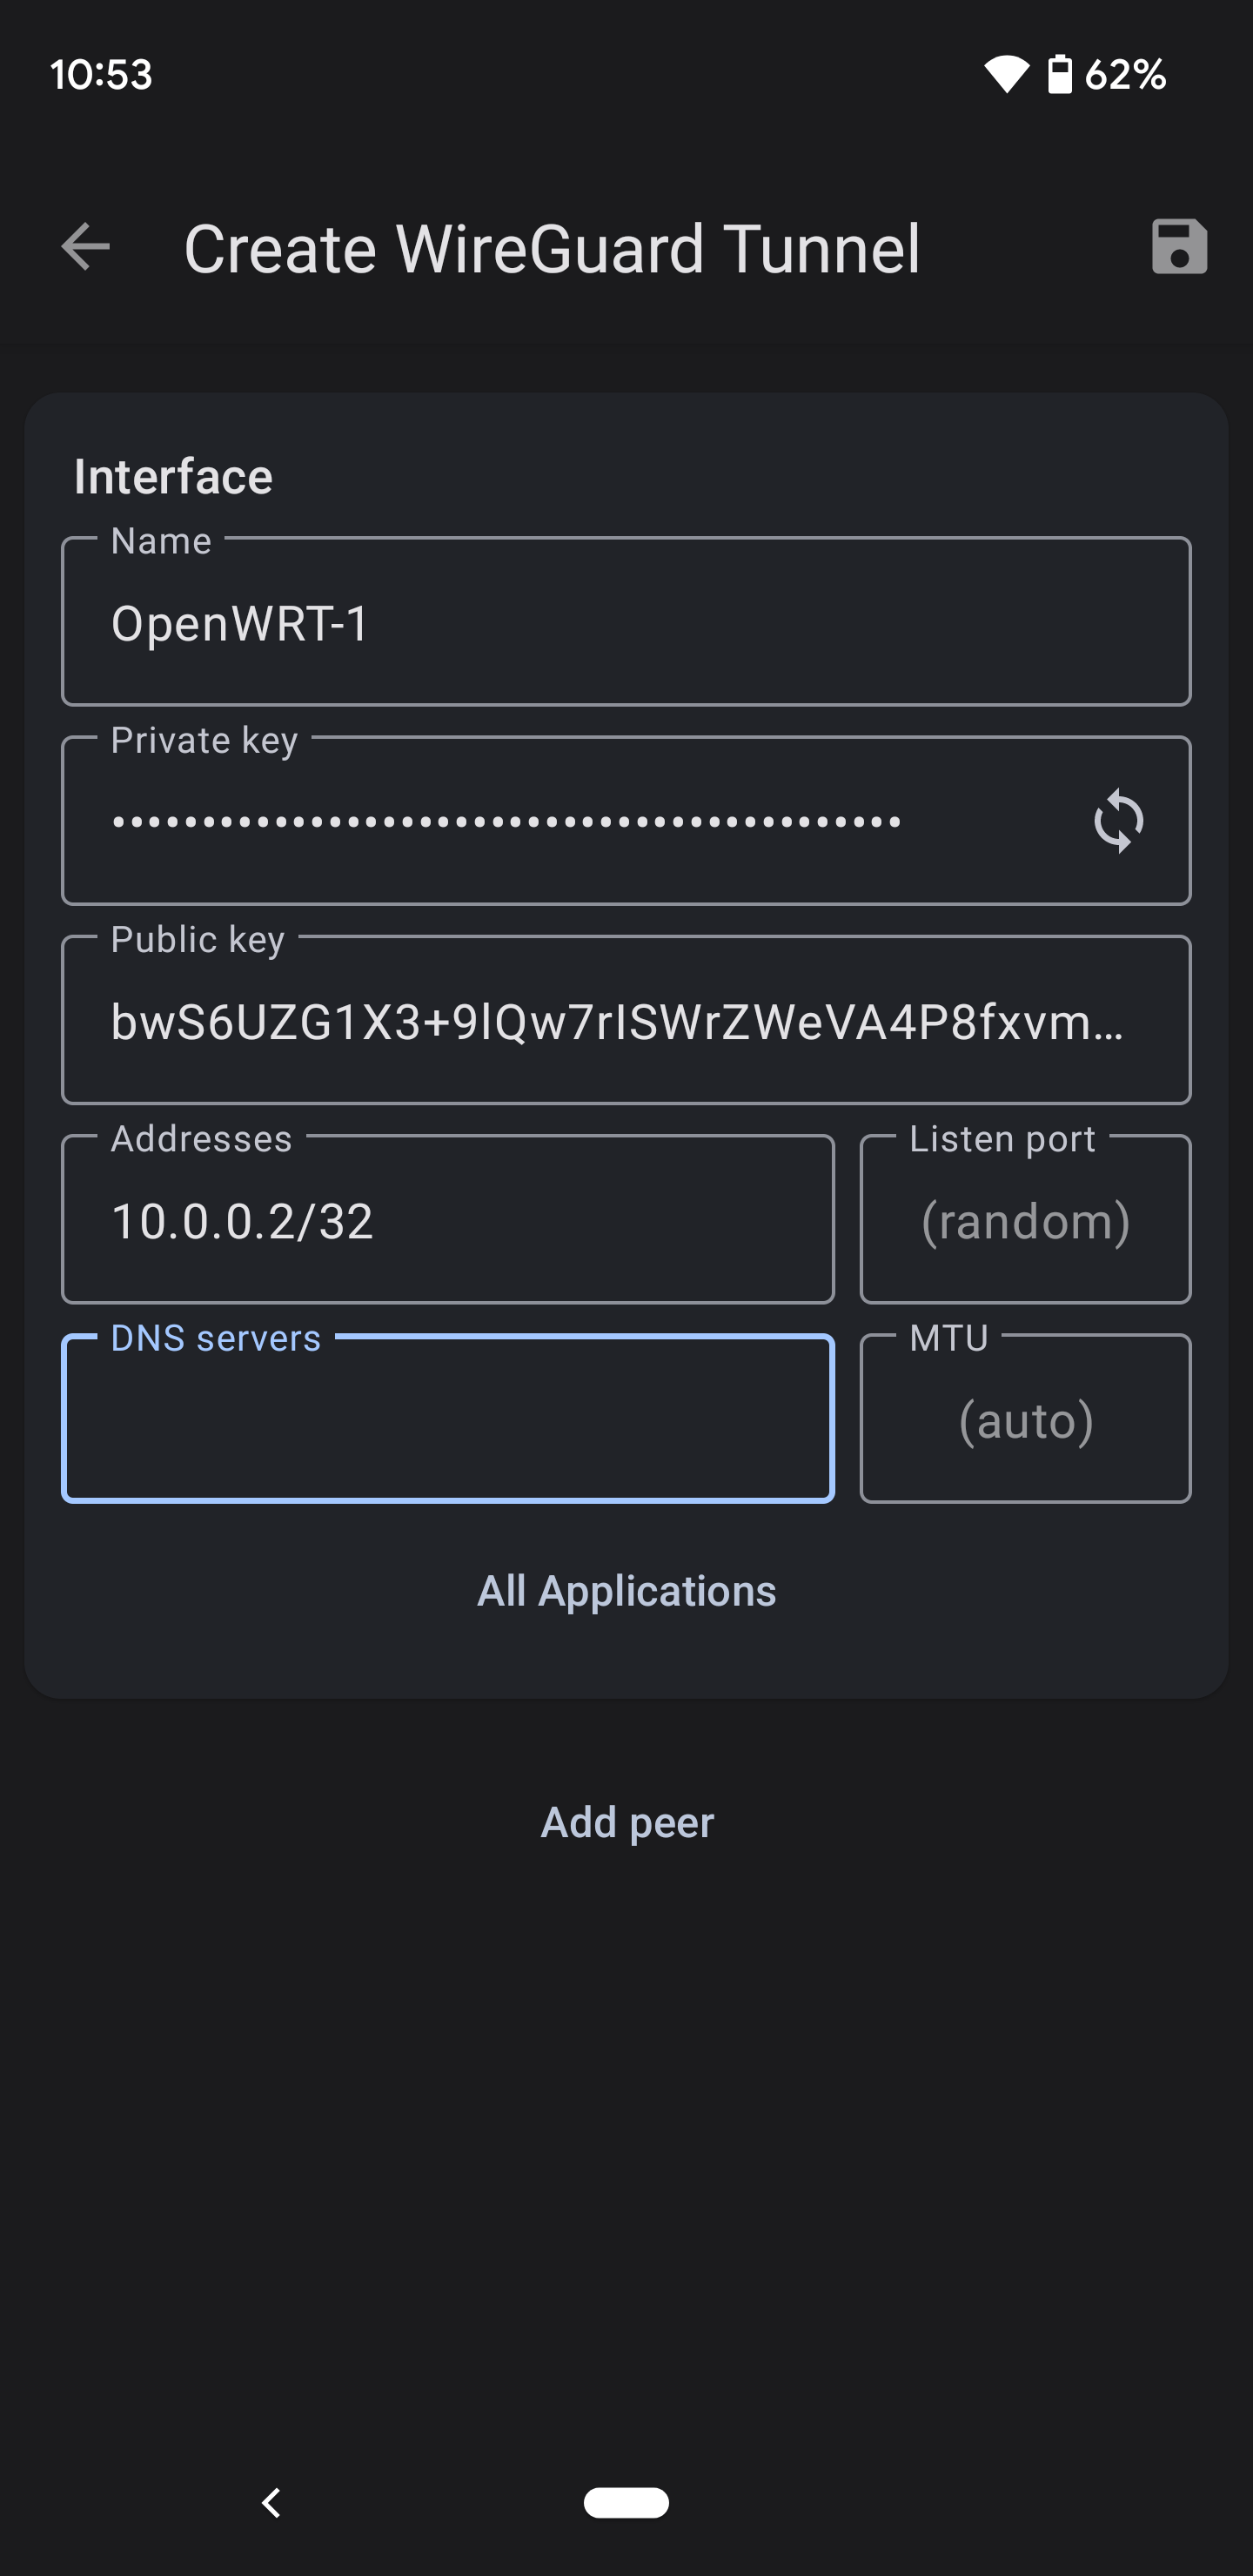
- Name: OpenWRT
- Click the refresh Icon to generate the
public/privatekey pair. Send thepublic keyto the server so it can be inserted into the Peer config. See Slide 27 #2 - Addresses: Set this to the same value populated in the peer config on the server. See Slide 27 #4
-
Click Add Peer
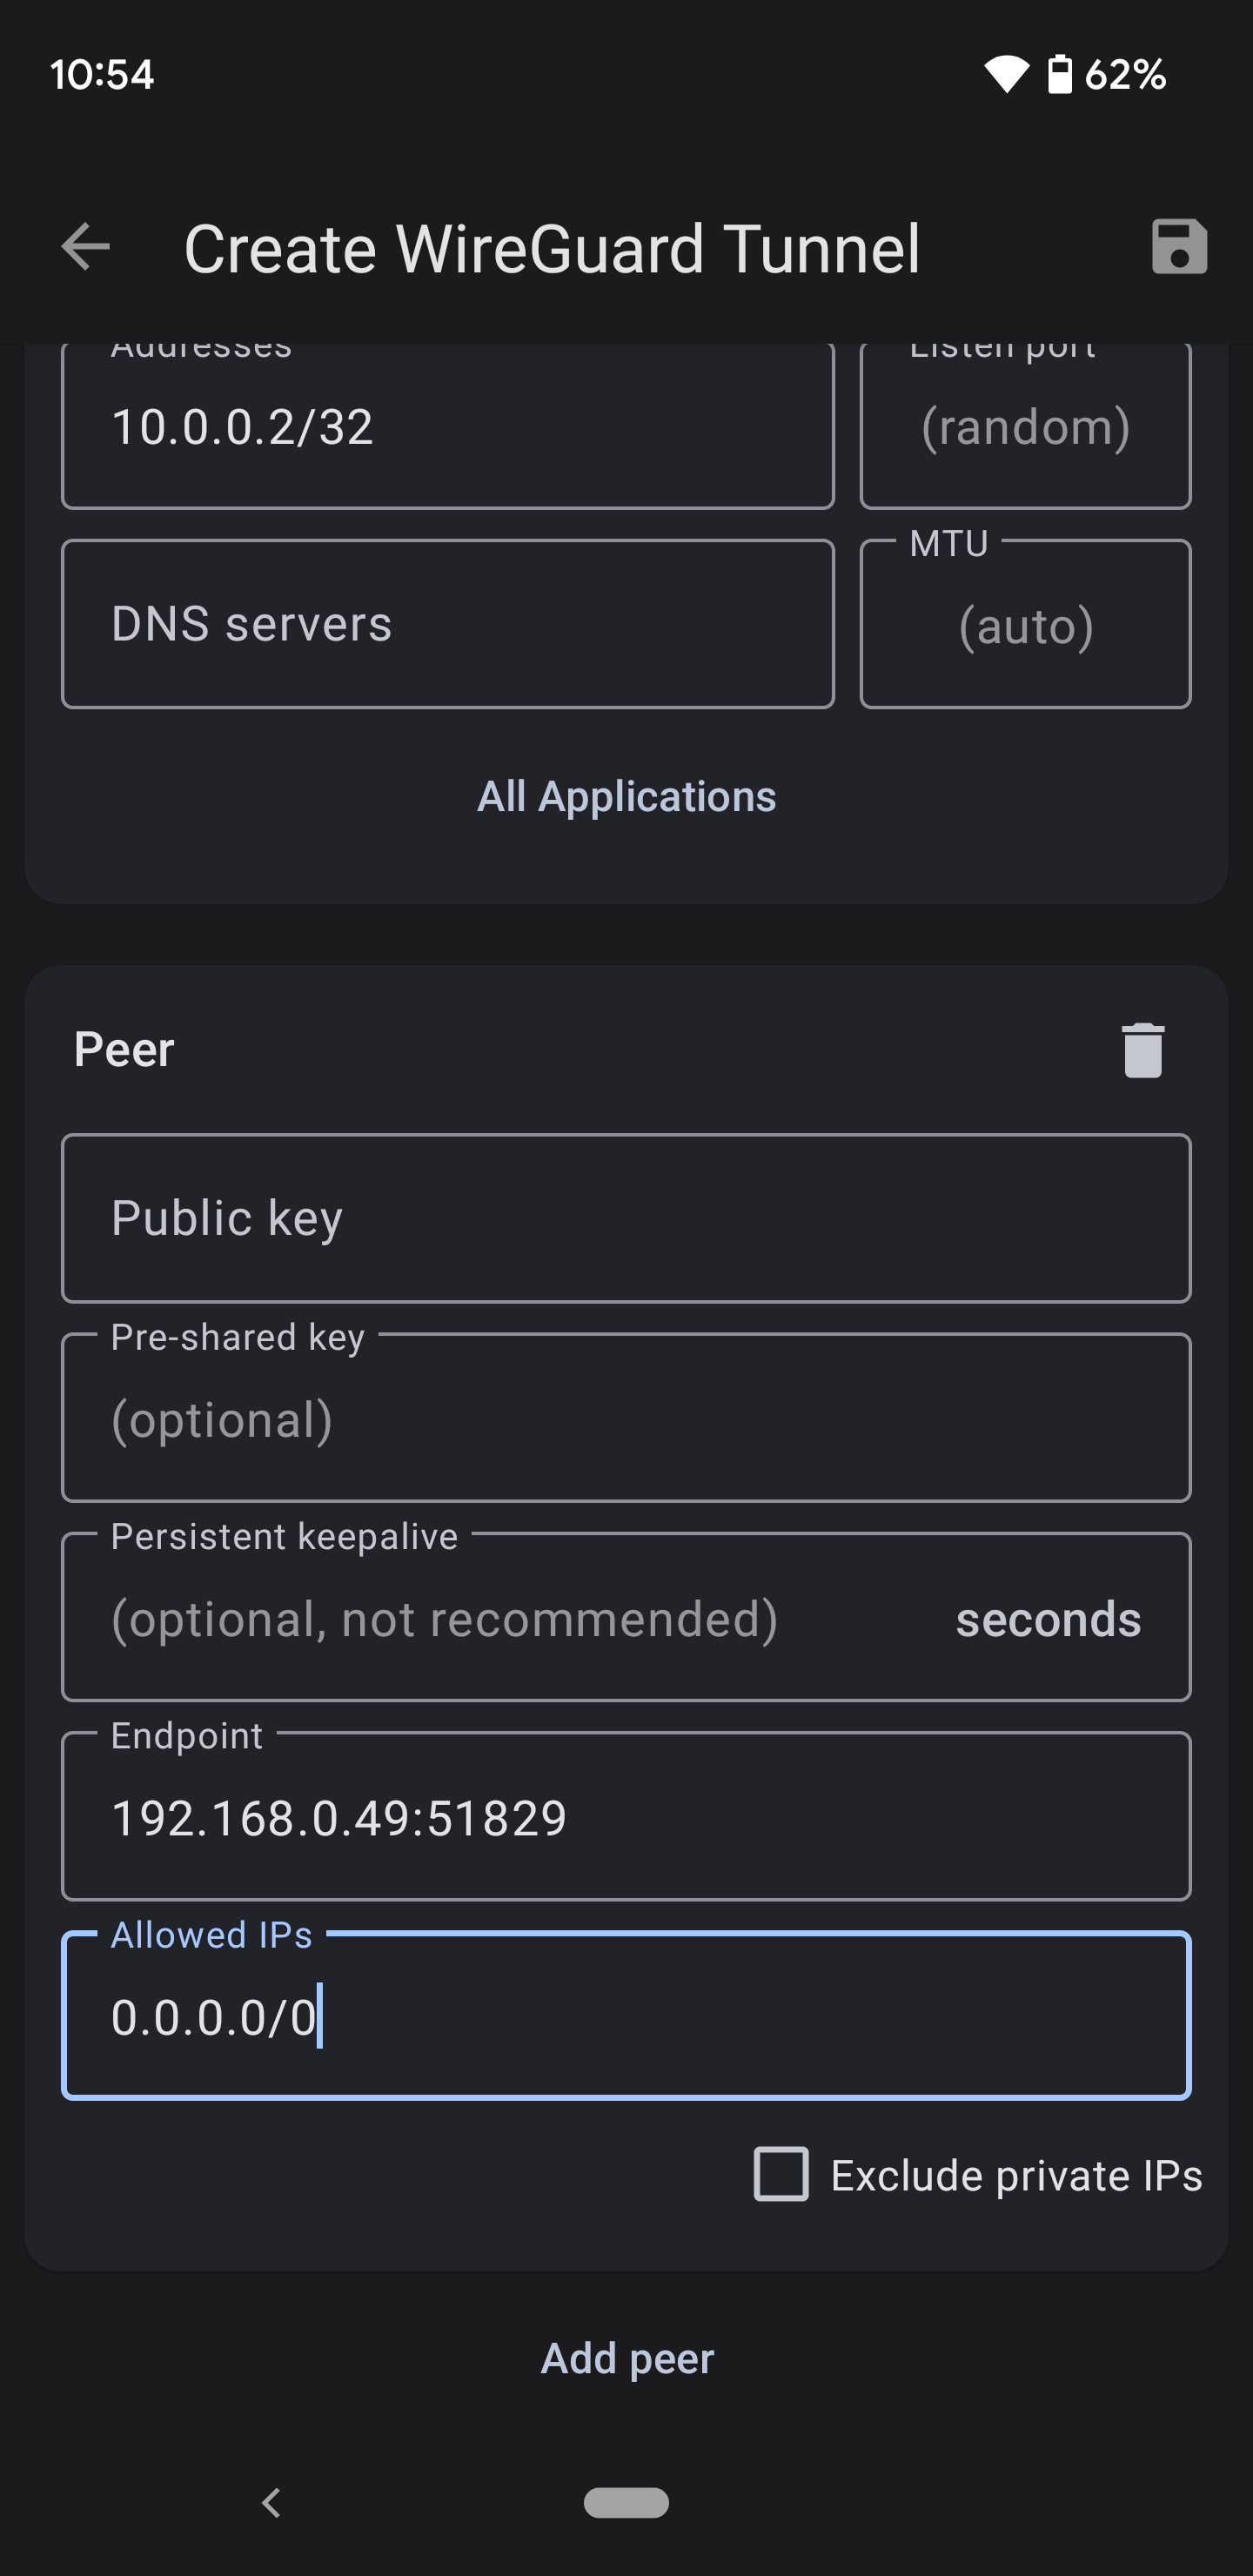
- Copy the
server public keyand paste it here - Pre-Shared Key. Copy the generated pre-shared key from the peer config on the server. Slide 27 #3
- Endpoint:
public IPof server and the port specified by the server: 51820 is the default. - Allowed IPs:
0.0.0.0/0, ::/0→ All IP’s
Option 2
Install qrencode
opkg update
opkg install qrencode
Setup Peer
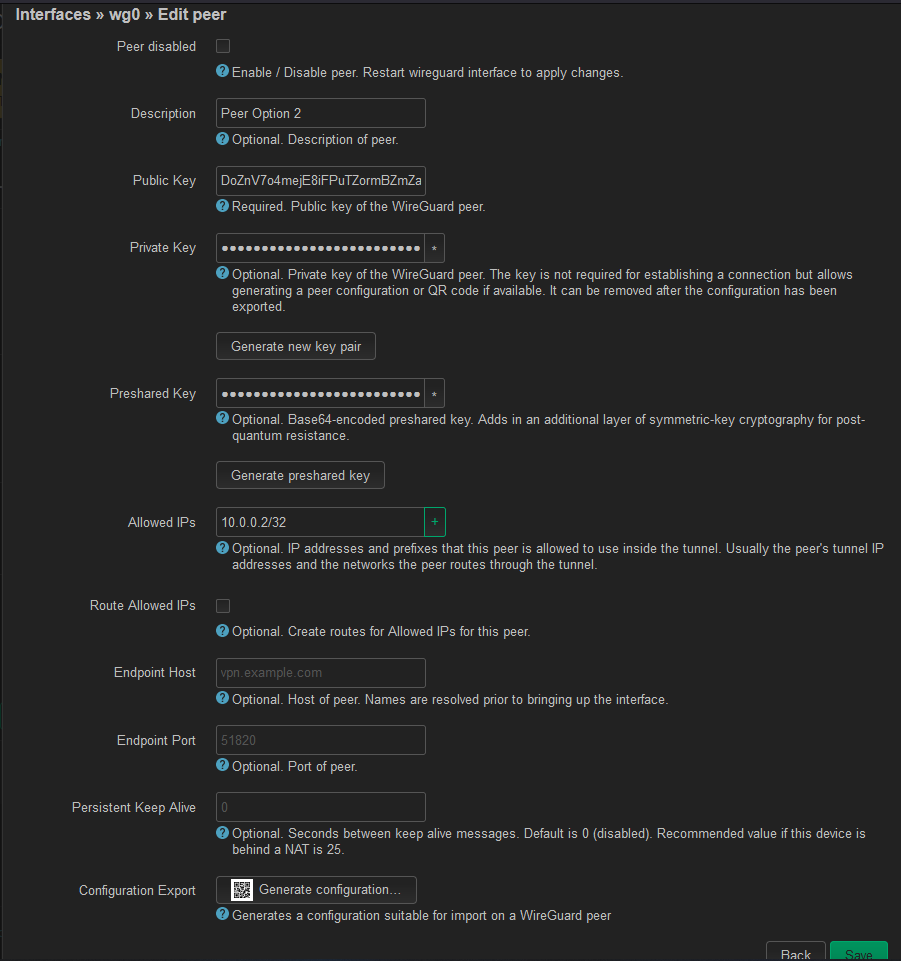
Then go to Network -> Interfaces -> wg0 -> edit -> peers -> edit peers
- Set the description of the peer
- Click “Generate new key pair” to create both the private and public key.
- Click “Generate preshared key”
- Allowed IPs: 10.0.0.2/32 → this should be unique per peer. Make sure you press the + to apply the IP
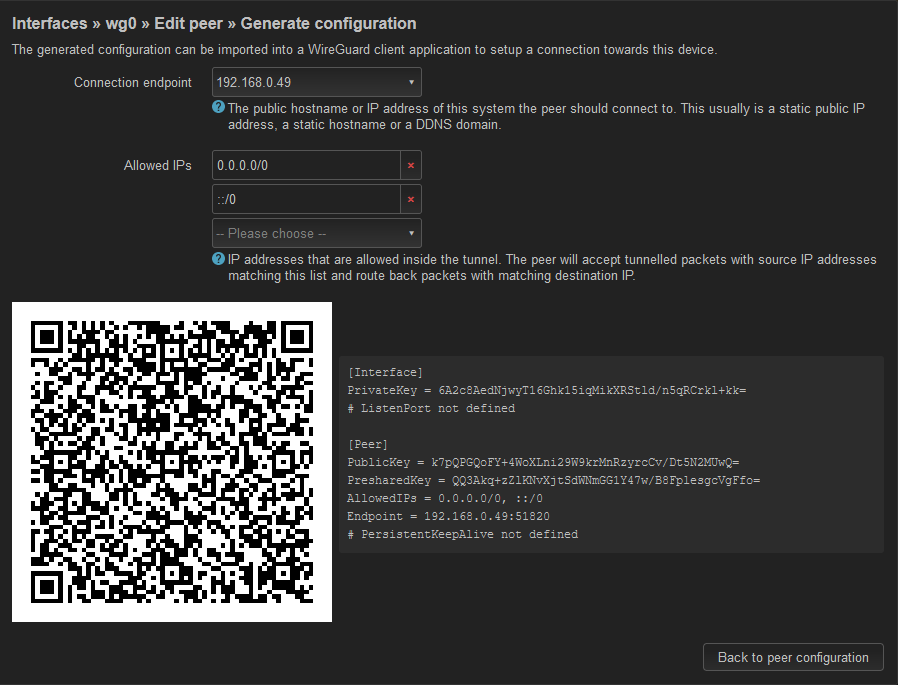
- Click Generate Configuration
- All the values here should be pre-populated.
- You can scan the QR code in your wireguard app to get the config.
- After you’ve successfully received the configs you will need to delete the private key from the previous screen.
Android Config Peer 2

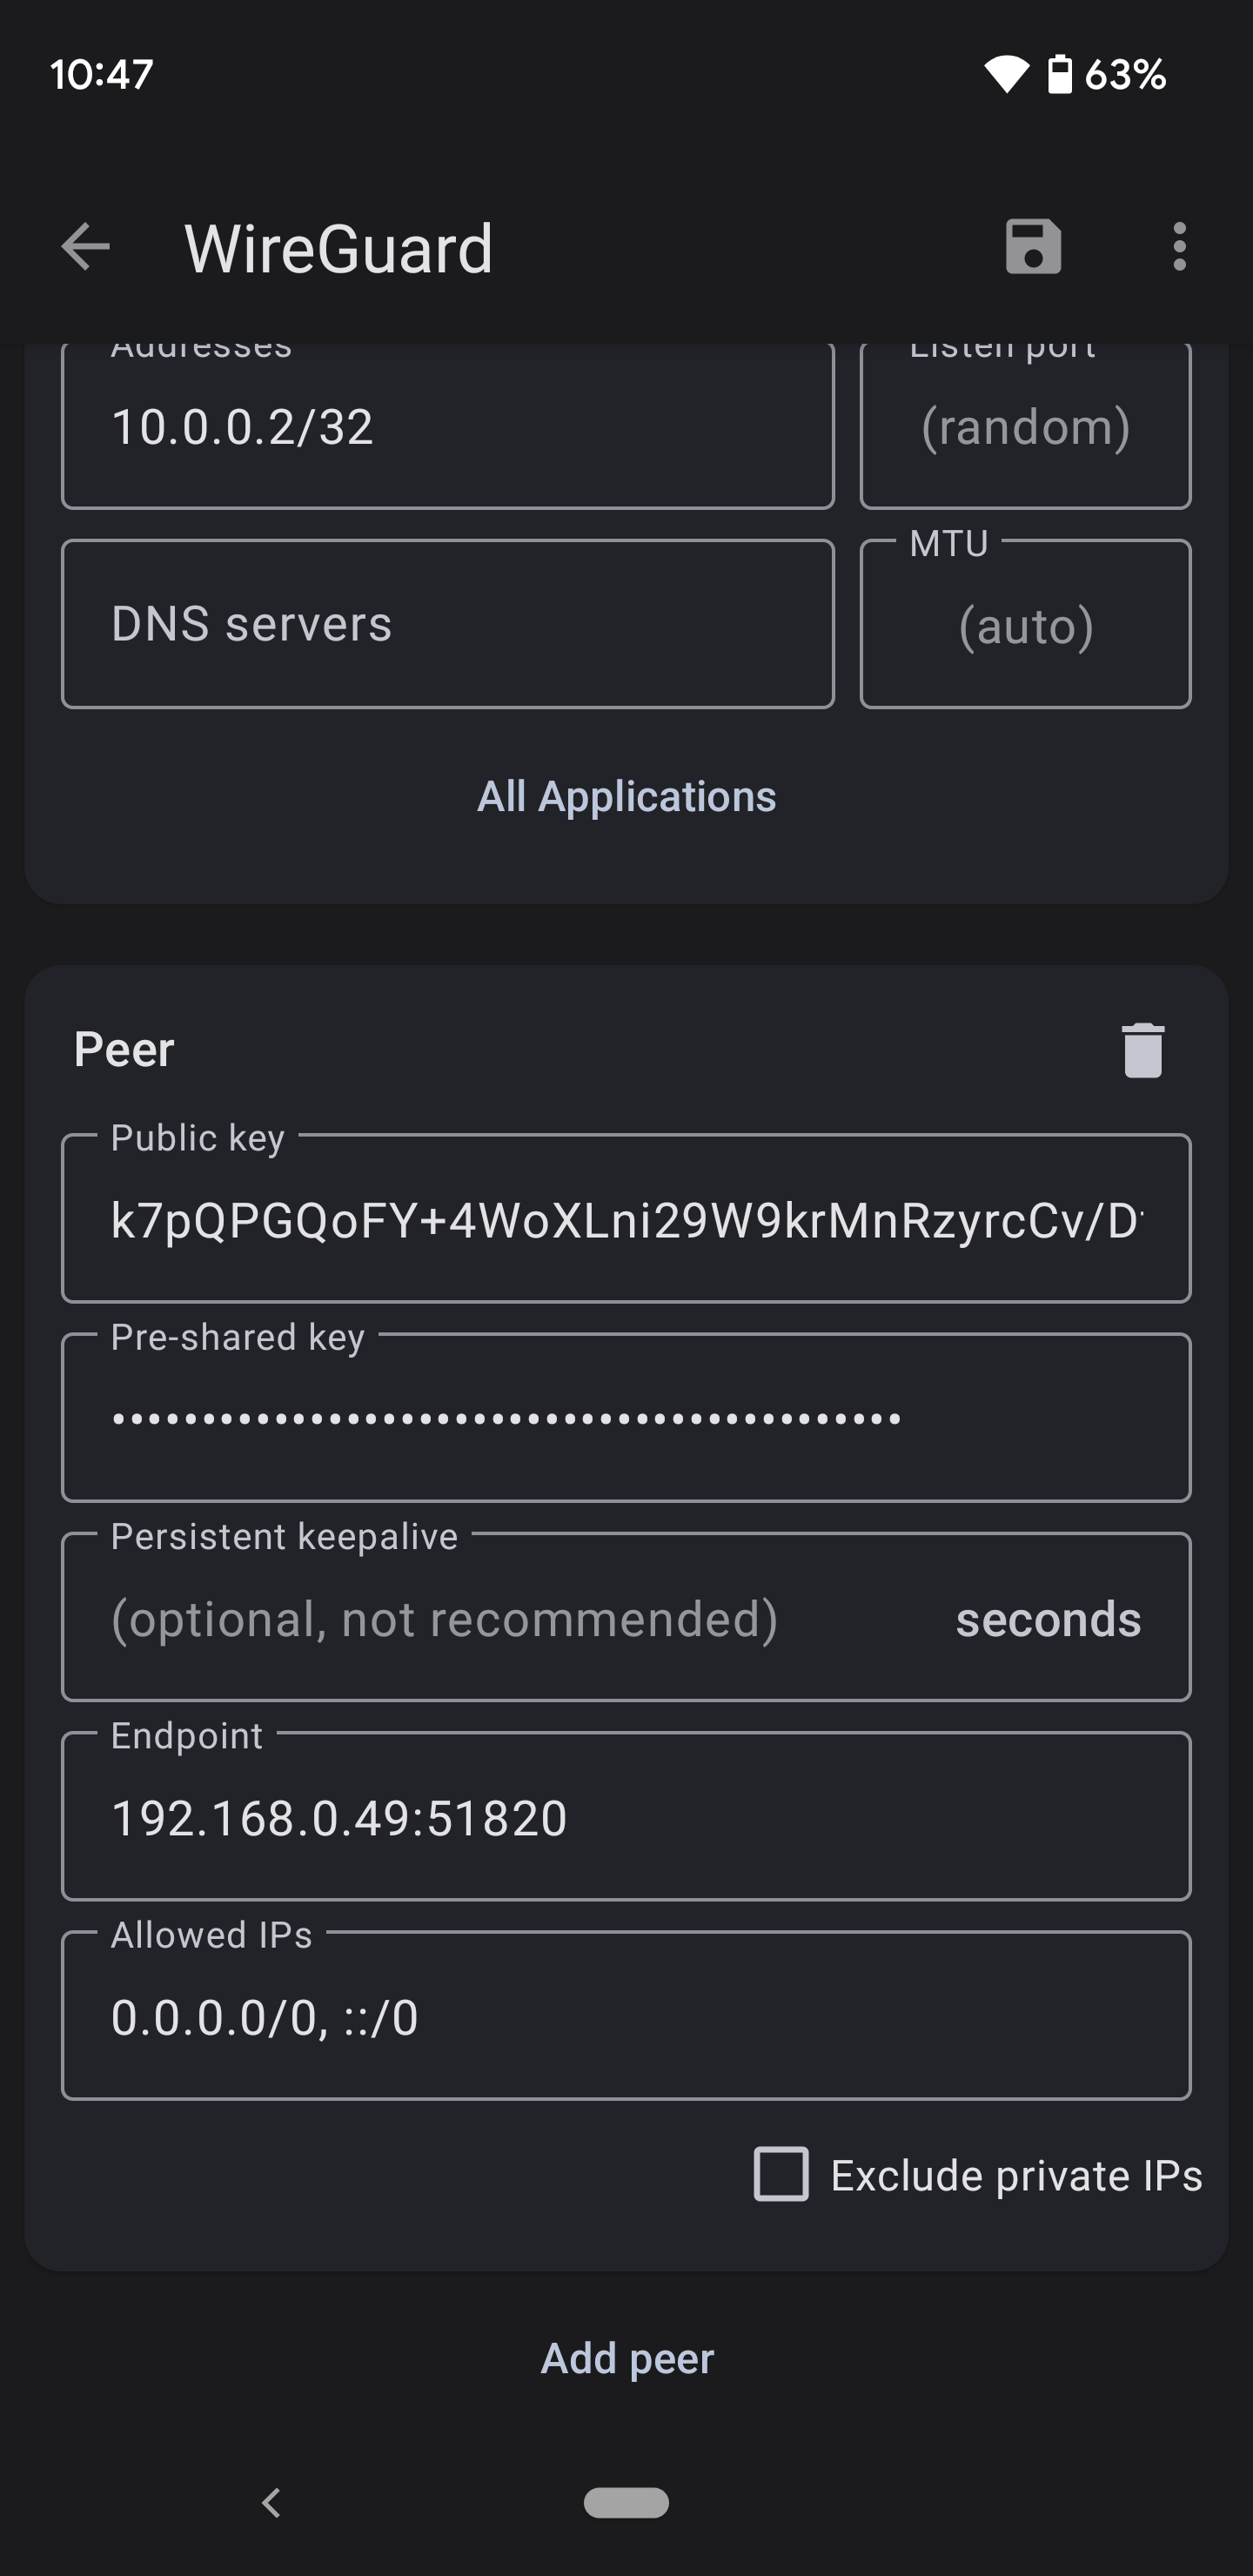
- After scanning the QR code you should see a config similar to this.
- You may have to add the Addresses here. It should be an IP within the subnet range specified in the server.
Ex: 10.0.0.2/32. (It should be unique per peer)
- All other fields should be pre-populated.
Verify Connection
- You may have to restart the wg0 interface in order for a connection to get established.
- Once you restart the interface click the toggle button on the Android app and see if a handshake has been created.
- The
rxandtxfields should start to increment
